Inhaltsverzeichnis
Score cards
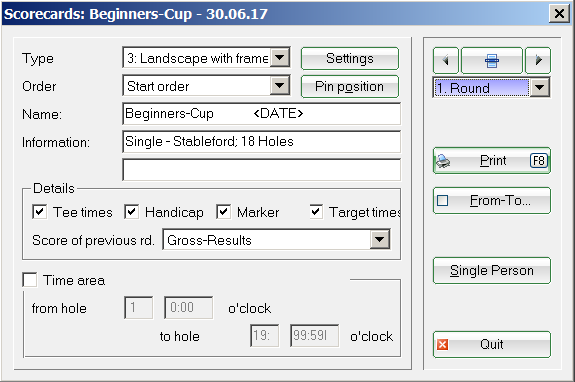
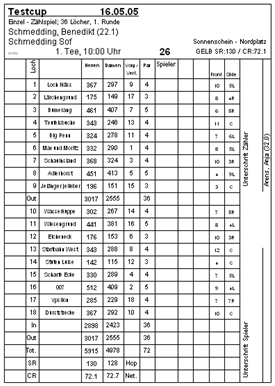
Clicking Print directly on the Competition window on the right side, or under Competitions/Print…/Score cards allows you to print arbitrarily designed scorecards for tournaments, either with frames or pre-printed scorecards:
Intranet-Course checking when printing the score cards
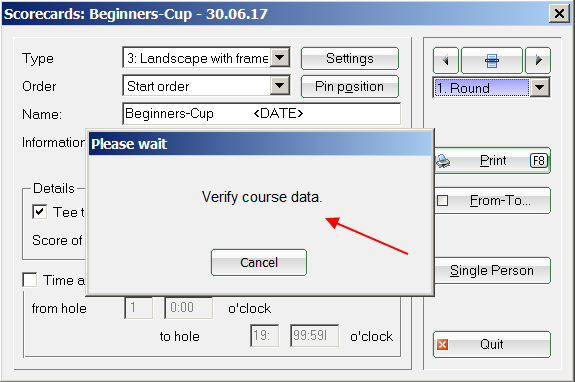
Only in Germany and Switzerland: when the scorecard print is started, PC CADDIE automatically checks whether the course information is up-to-date. This has the advantage that you can not inadvertently print scorecards with outdated data:
Handicap distribution for foursome games
The handicaps are distributed according to the standard distribution key for men (DGV specification system)
Foursome and scorecard automatic
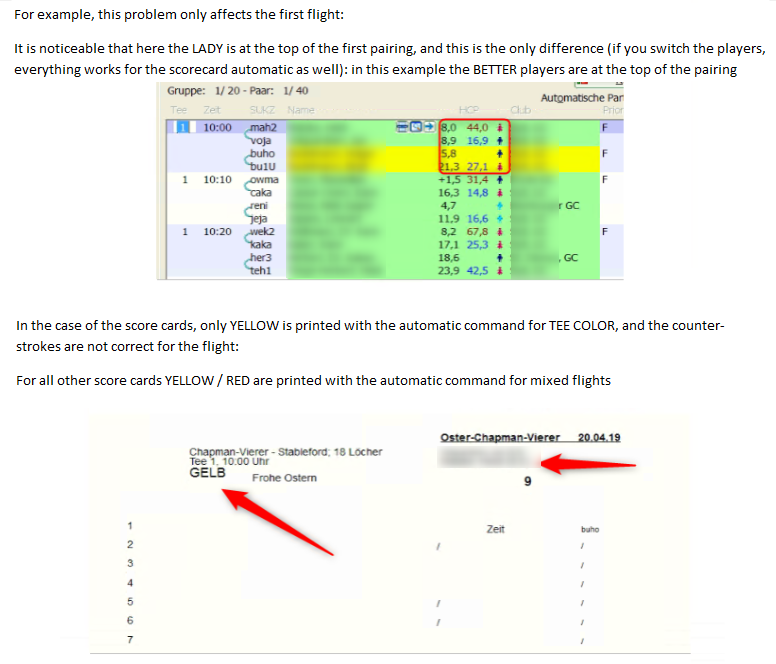
Not everything can go in every combination regarding the scorecard fields, but the calculation in the game itself will not be affected.
Take this example: when in a pairing you have once a man and then a woman as the first one, this has an effect on the automatic scorecard fields. Not everything can be automatically printed in every variant, but the game is still calculated correctly.
Select the scorecard type
PC CADDIE offers you the following Type variants:
- 1-9: Open types
- Continuous labels
- Laser labels(2×8)
- Old: Customize your card
- Old: Card only with HCP distribution
- Old: HCP distribution side by side
Normally, only the nine open types should be used in a new configuration, as the settings are much more flexible. „Continuous labels“ and the „Old“ types are preset and are only available for clubs that fill their scorecards with an continuous matrix printer.
Laser labels can be used, for example, for color competitions, as will be further explained.
Print scorecards from PC CADDIE
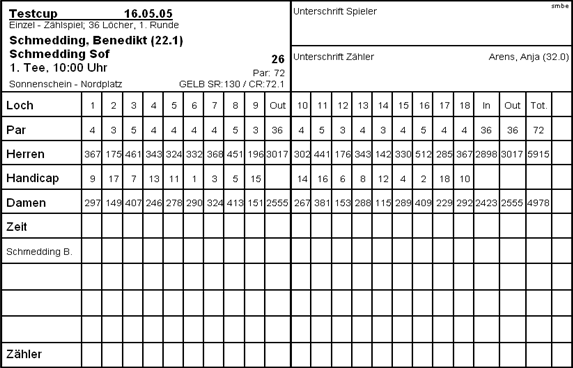
HINT: We recommend to leave the tournament score cards completely blank on the inside, for golf courses with good laser printer equipment. PC CADDIE can frame the data before printing. This procedure has very important advantages:
- You can choose a finished format without customizing your preprinted scorecards. In addition, the print fits perfectly into the frame and results in a very uniform overall picture.
- Changes in the rating values, meters, etc. are changed directly in the course data - and the next scorecard is printed correctly with the new values.
- If you want to change the design of your scorecard, or you want a very special layout for the club's championships, you can do this yourself. We would be happy to assist you with more elaborate changes to the scorecard layout.
HINT: Please always save the original layout before making any changes.
It is possible that the different rating values are printed when golfers start the tournament from different tees. The scorecard design can be adapted for this purpose. You have three options For printing the rating values:
First, choose a New, preset format. To do this, go to the scorecard function under Persons/Print: Score-Cards and press Setup. Click on Save into a file and save your previous format with a name including the date, for example z.B. „Scorecards23112010.SCK“.
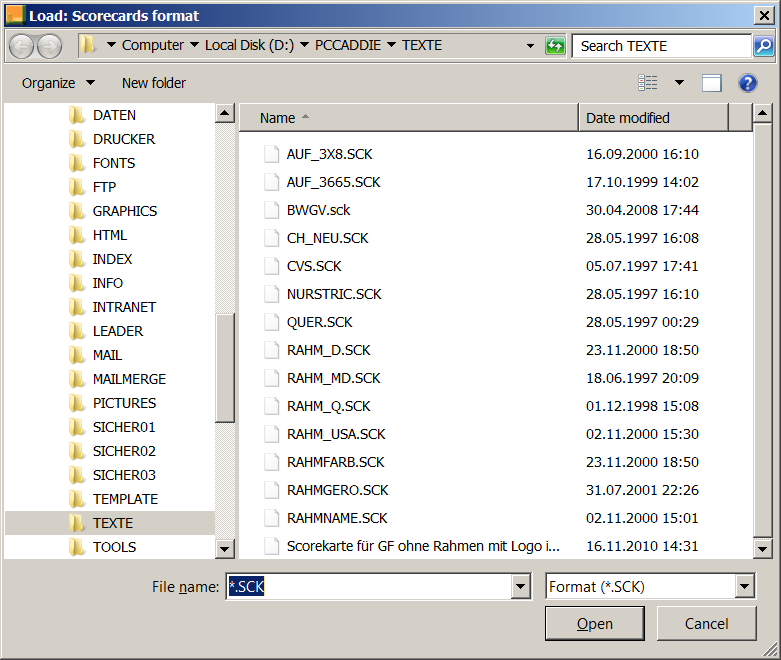
Next, click on Load from a file and choose one of these formats (or your own as a copy to the position of a open type):
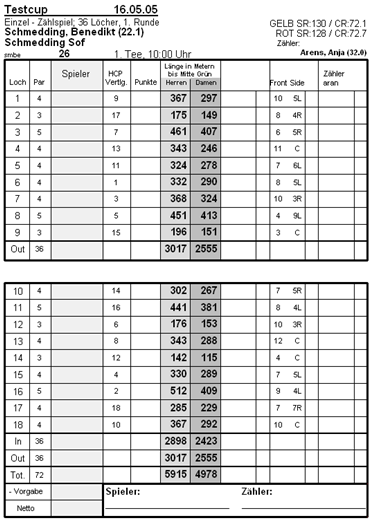
- RAHMUSA.SCK: Scorecard for courses with two lengths, from left to right
- RAHMGERO.SCK: Scorecard for courses with two lengths (yellow/red)
- RAHMFARB.SCK: Colored scorecard for courses with four lengths
- RAHMNAME.SCK: Scorecard for courses with two lengths, with names for each hole
Confirm the selection with OK and test the printout.
Now add the slope and course rating values under the Length column. Frequently, one or two lines are free under the totals of all 18 holes (for entering of handicap and net result in the Players column). If you select the „Rating under length“ or „Rating under lengths, one line“ option, the rating is printed in the length columns, in the lower lines. If necessary, move (or remove) the elements „Hcp“ and „Net.“, Which are printed under the hole number, to the right in the column of the handicap distribution.
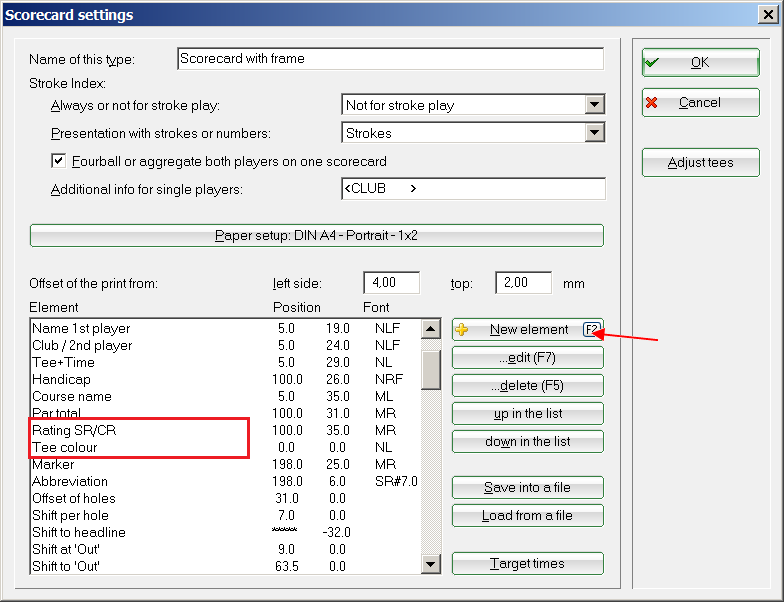
Finally, add the slope and course rating values in the scorecard header with Free positioning. The elements „CR/SR…“ can be selected and positioned using the button New element(F2) in order to do this. Of course, you have the option to print the values of the tees on which the currently printed player plays with the element „Rating SR/CR“ separately, even with the complete print-out of the scorecards.
Settings
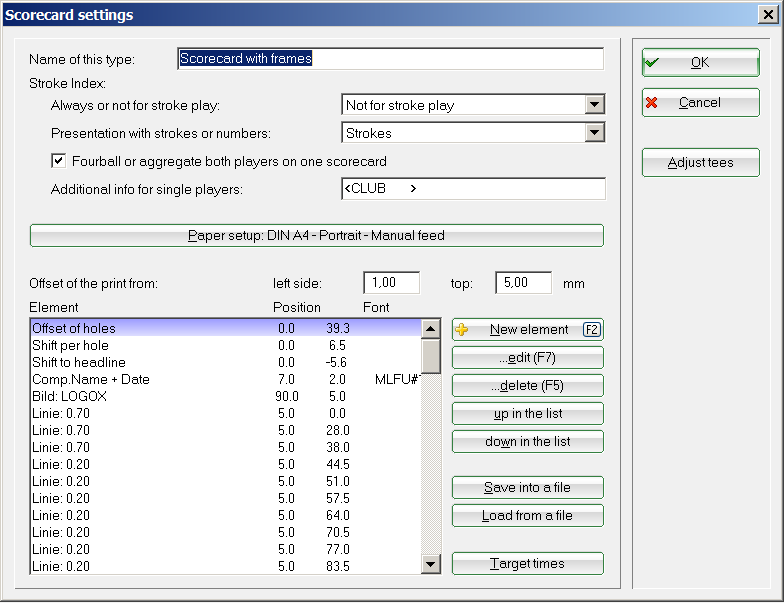
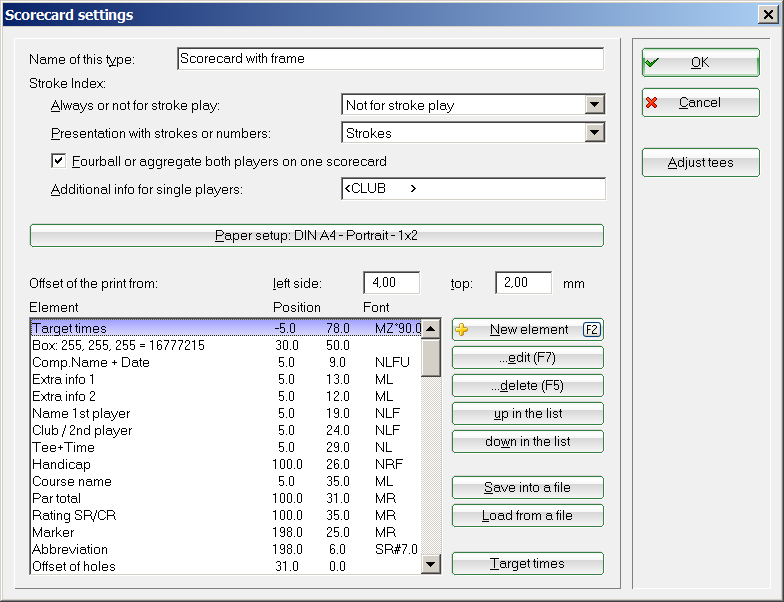
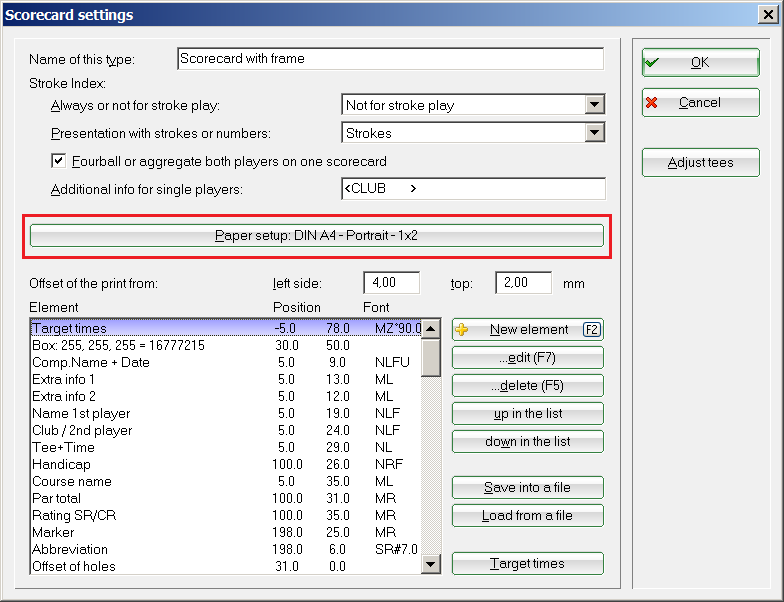
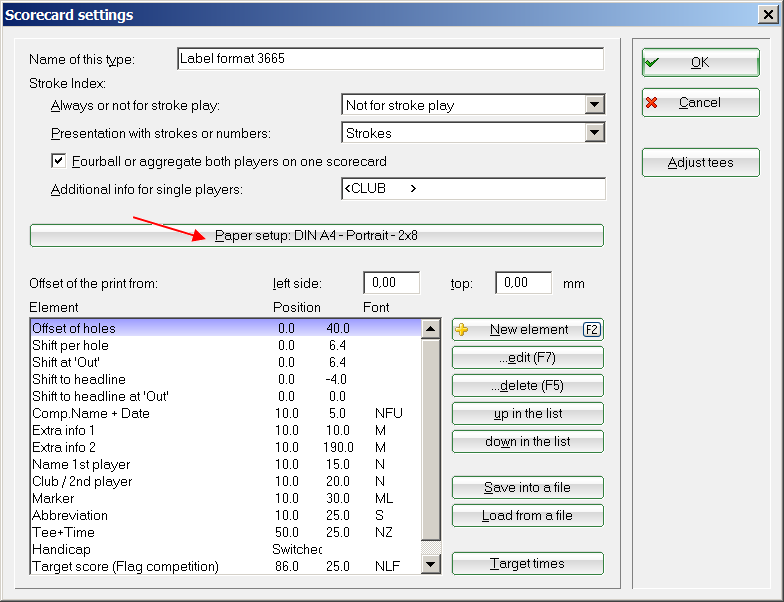
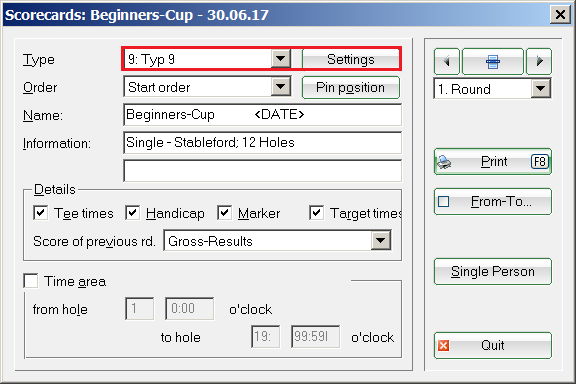
Considering the above reasons, we will only elaborate on the open types. Each of these types includes a setting option. In principle, the types are the same - but you have the option to define a different scorecard for each of the nine positions. For example, type 1 could be used to store your existing scorecards, while type 2 stores how PC CADDIE prints complete cards with frames. All other types are then still free for further variants. Clicking on Settings allows you to change the preferences for the currently activated type:
Here you can adjust everything related to the scorecard print. It is best to give a concise Description of the type. The description „Scorecards with frames“ is used in our example.
General settings
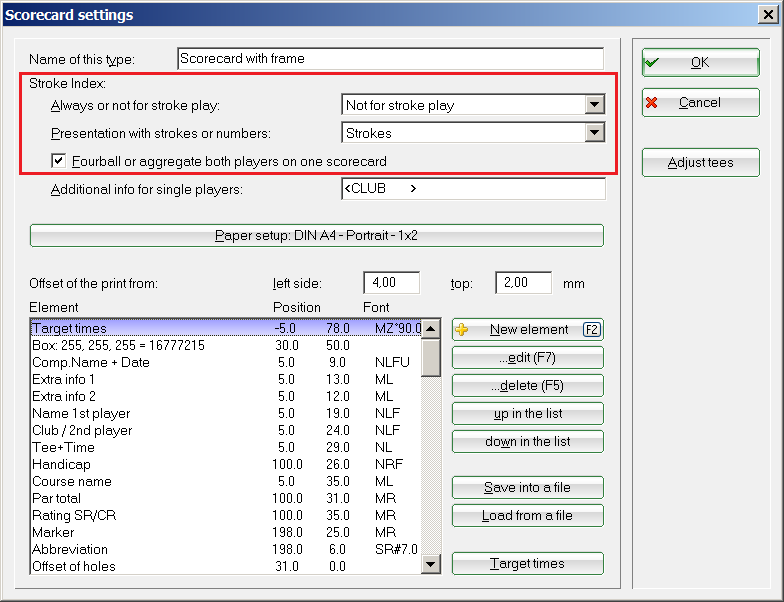
Always or not for stroke play gives you the following options:
- Not for stroke play - This is the normal setting and it means that Stableford and Par will be printed using the handicaps, but not the stroke play.
- Always - in this case the stroke play will also be printed using the handicaps.
- No stroke index - No handicaps will be printed.
In the case of four-ball games, the handicap distribution for both players is also output in the setting „Not for stroke play“, since in this case the comparison of the net hole results is to be simplified for the players.
HINT: If you don't want this, select „No stroke index“for the four-ball tournament!
Use Presentation with strokes or numbers to set whether the handicap distribution is printed in the usual way as dashes, or using a representation in figures (net par). Net par means that in a 4-holes par in which one player had 2 strokes handicap the number „6“ (the net par) will be printed instead of two dashes (//). This is sometimes a meaningful setting for beginners tournaments. To do this, select „Net par“ in the scorecard settings for Presentation with strokes or numbers:
The option Fourball or aggregate both players on one scorecard should normally be activated, otherwise a card will be printed for each player in four-ball or aggregate games.
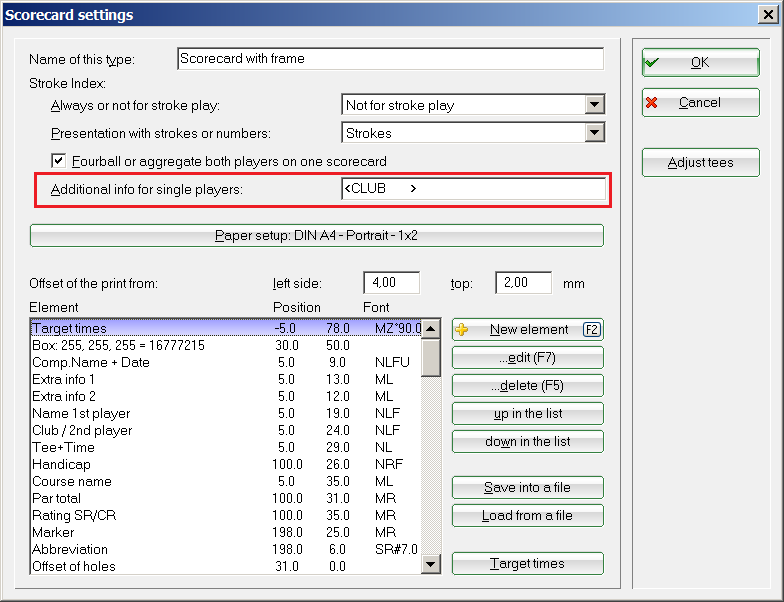
The field Additional info for single players should usually contain only the „<CLUB>“:
However, you can trigger special functions using the following additions. Write one of the following commands behind the existing entry in order to do this:
| <MSPV> | The handicap will be printed behind the name for members |
|---|---|
| <ISPV> | The handicap will be always printed behind the name (also for guests) |
| <MSTV> | The EGA-handicap (master sheet) will be printed behind the name for members |
| <ISTV> | The EGA-handicap will be always printed behind the name (also for guests) |
Paper setup
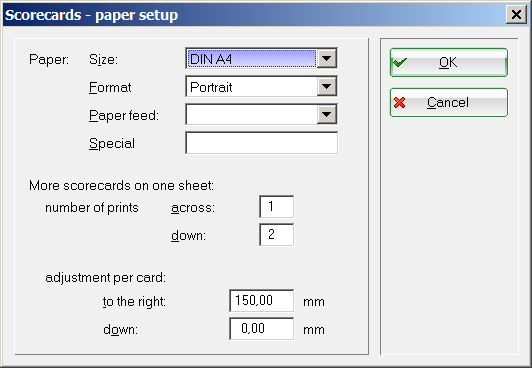
You can specify the orientation of the card on the paper by clicking on Paper setup:
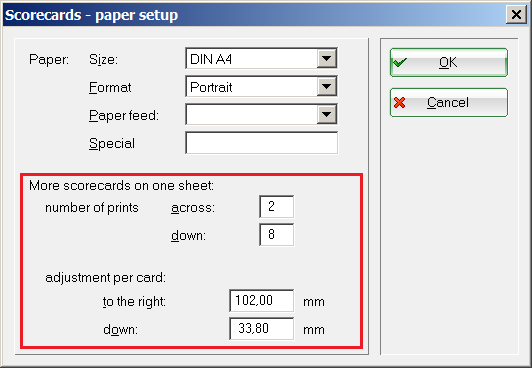
Note that it is more convenient to leave the DIN A4 format, although the cards actually have DIN A5 size! Especially important are the Format and the possibility to print More scorecards on one sheet. For example, you can have two scorecards printed side-by-side on a landscape A4 sheet. Then only the cards in the middle have to be separated. This option is also very important when you want to print labels, in which case you can define how many labels can be placed next to each other and one on top of the other one one single sheet.
QeSc - competitions with qualified electronic scorecard
Information available under: QeSc - Competitions with Qualified electronic ScoreCards
Define appearance, position elements
The fields adjustment per card to the right and down allows you to position the printing on the paper. However, you usually have to make this setting at the end, after all the individual dimensions have been set correctly. Note that you can also enter negative values! For example, if you enter „-5.00“ in to the right field, the, the print-out is moved to the left with 5mm!
HINT: You should Save into a file the current format before you modify the settings. The saving location is the TEXTE folder in PC CADDIE. You can then load the format as needed, like any other prepared formats. To do this, use Load from a file and select one of these formats:
- CHNEU.SCK ⇒ All course information is printed
- NURSTIC.SCK ⇒ In addition to the main information, only the handicap distribution and, optionally, pin positions and set times are printed
- RAHMMD.SCK ⇒ The scorecard is printed with frame
- RAHMQ.SCK ⇒ The scorecard is printed with borders, but in landscape
- RAHM.FARB.SCK ⇒ Scorecard with color and frame
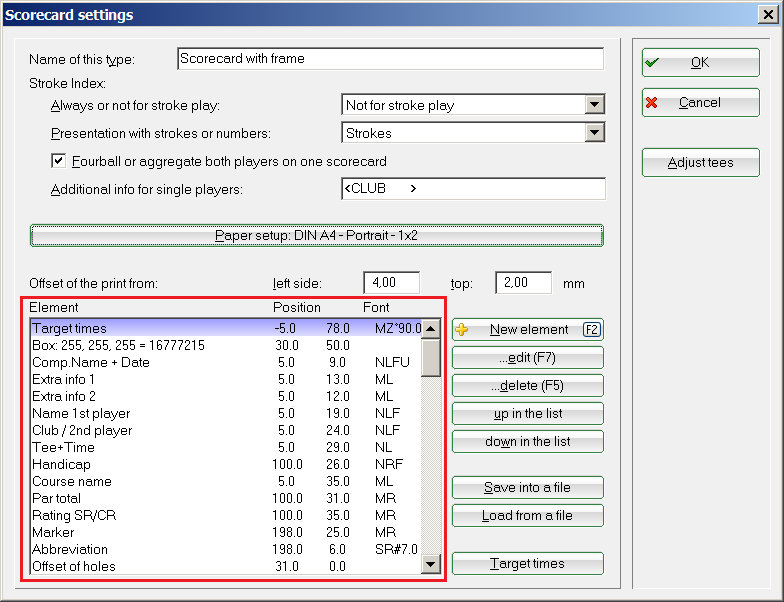
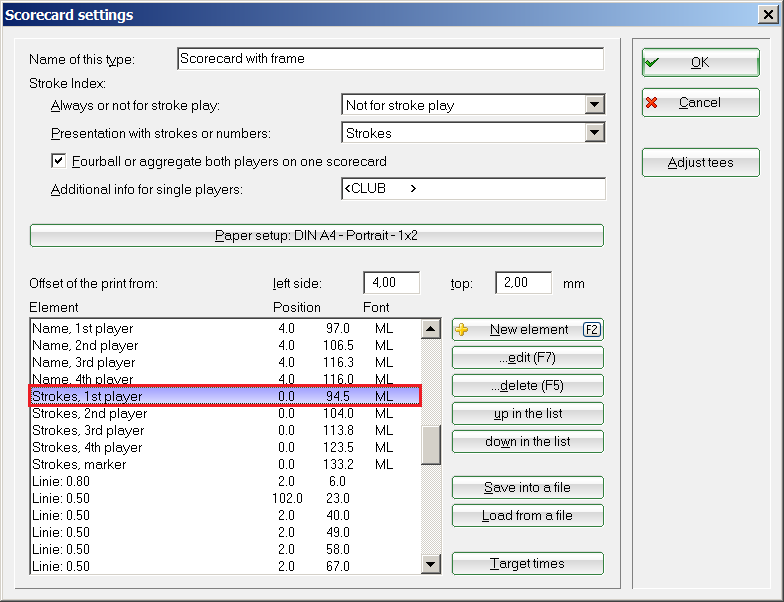
Load these formats and print them out to get an overview. The format closest to your ideas can be edited as follows: In the list of elements, the components that make up the Scorecard print are listed individually:
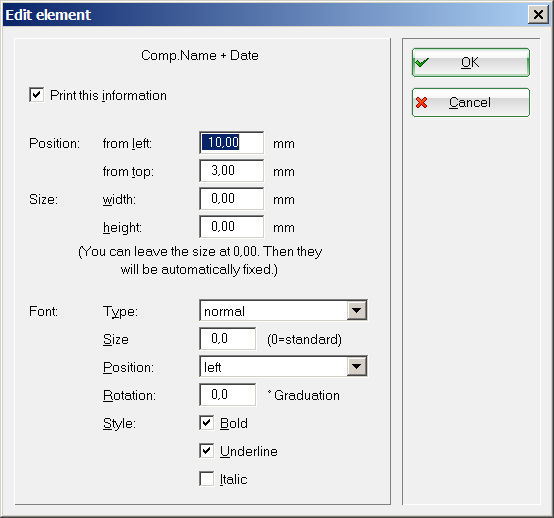
A fairly simple example of such an element is „Comp. Name + Date“. Use the button…edit (F7) from the right side of the window to edit this element:
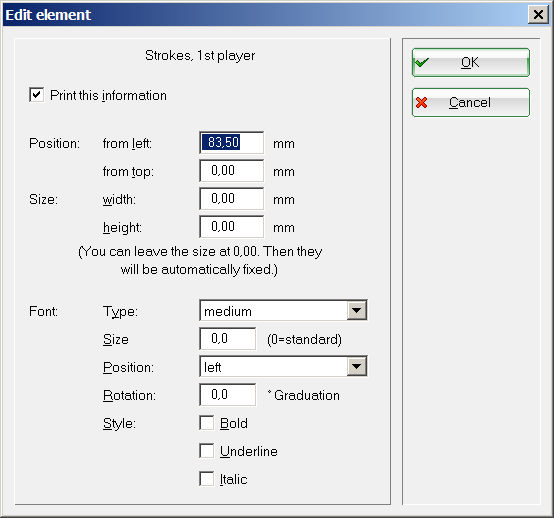
Here you can easily define the Position of the element in millimeters from left and from top. In addition, the font type can be freely set. The positioning is very easy for elements such as the tournament name, start time, etc., which occur only once on each score card. For entries to be made for each hole, such as the handicap strokes, lengths, par, or handicap distribution, the things are somewhat more complicated:
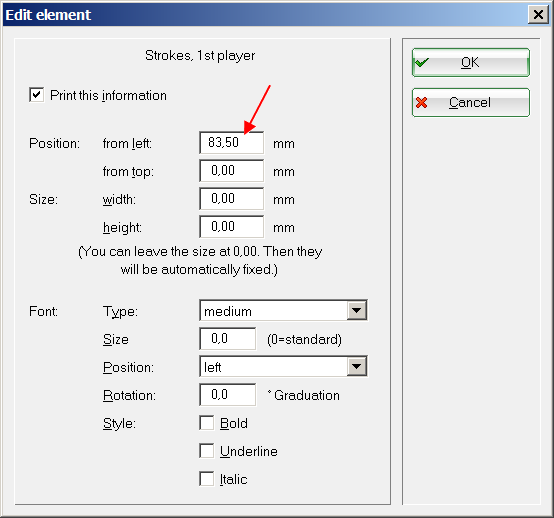
For the element „Strokes, 1. Player“, specify only the distance to the left side of the edge for printing the strokes. The position from top remains empty here. This is somewhat different for each hole, and is therefore the result of the elements „Offset of holes“ and „shift per hole“. The offset of the hole entries determines the height at which the first hole is to be printed or filled. Changing these values moves all the hole entries together across the paper. Set the line spacing for „Shift per hole“. This specification must be very precise, since a slight deviation increases to a large offset over the 18 holes. Special tasks must be solved with the following elements:
- Shift to headline ⇒ determines how many millimeters above the first hole a possible column header should be printed (in the case of four-ball the information what should be written an in which column). The value entered here is usually a negative one, since it is an upwards offset!
- Shift at out ⇒ is necessary if an irregular distance exists between the holes 9 and 10. If this element is missing, PC CADDIE assumes that the „Out“ line is the same as a normal hole row. If this is not the case, you must add this element and enter the appropriate distance.
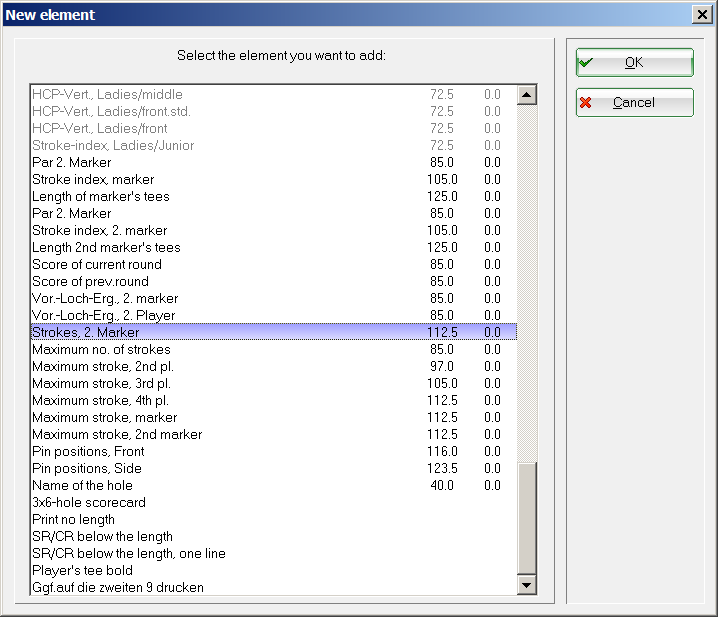
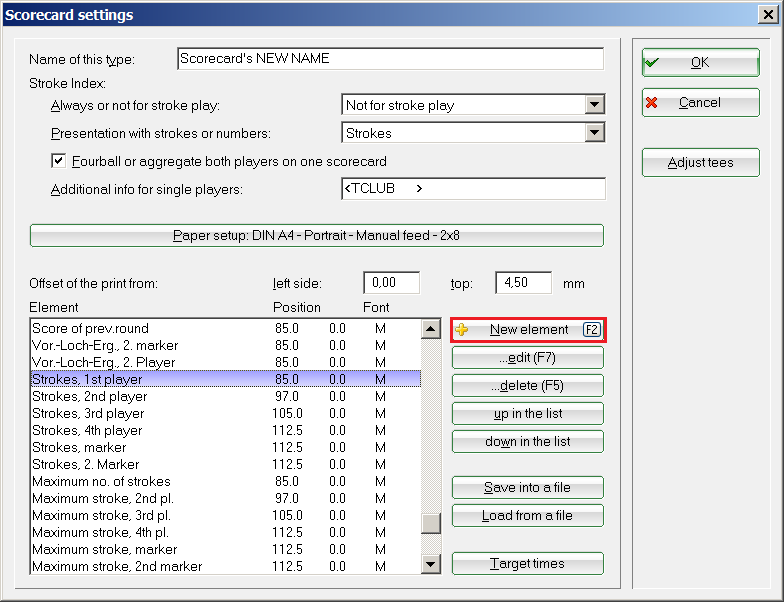
If you want to add more information to the scorecard, you can paste it after clicking New element (F2). Your settings are saved automatically after confirming with OK. In addition, it is possible to save the configuration on the hard disk under an individual name with Save into a file . This gives you a double security, creates a wide selection of alternative configurations, and you can also transfer the settings via an external support from one computer to another!
HINT: You can also print throughput times (hole-wise) and point distribution on the scorecards.
Print handicap distribution for players and markers
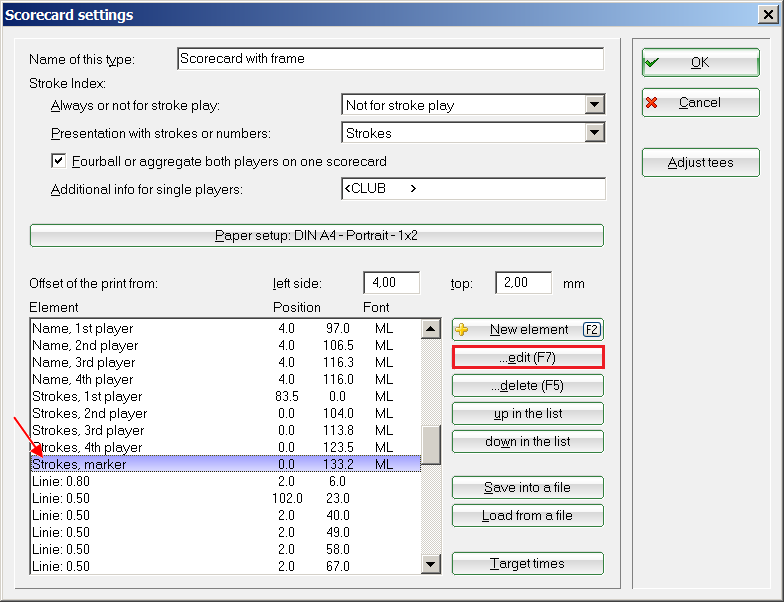
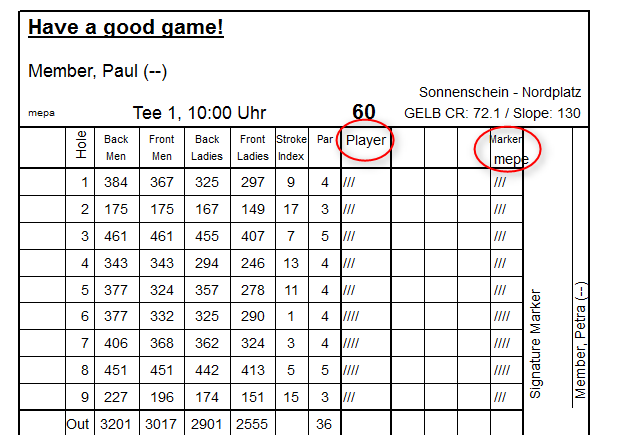
The possibility to print the The handicap distribution of the markers on scorecards in a separate column is very important. Just add the in „Strokes, marker“ element using the New Element (F2) button and enter in PC CADDIE the position where this element should be printed.
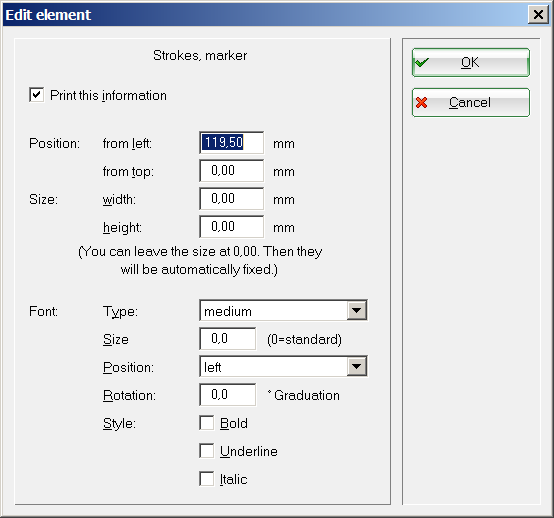
To enter the correct position at which PC CADDIE should print the desired data, select the corresponding entry in the Scorecard settings window and then select Edit ( F7).
In the next window, enter the position and confirm with OK. You can use a ruler to measure the position at which the information is to be printed. Enter this information using the „from the left“ and „from the top“ fields. Use Fonts to simply set the existing settings for „Strokes, 1st Player“.
The strokes are printed for the player and the marker at the set position.
Print player's tee in bold
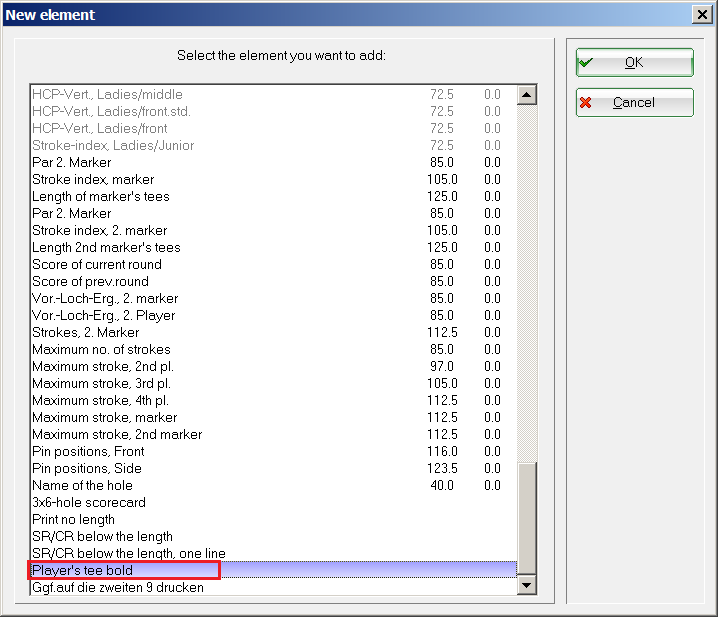
When printing a scorecard you have the option to print in bold the players' tees. Press New Element (F2) in the Settings window and add „Player's tee bold“.
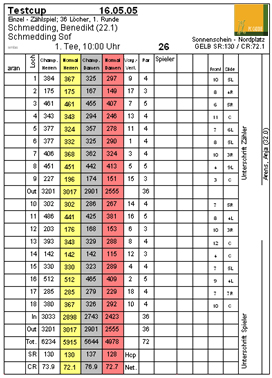
Tee color or CR-value
You have the choice:
Do you want to automatically print the CR values for the player on the scorecard?
Or is there too little space on the scorecard? Then printing the Tee color for the player can be used instead:
Choose between these two commands (found under elements):
Here you can see the result of using both commands. Decide!
Scorecard for holes 10-18
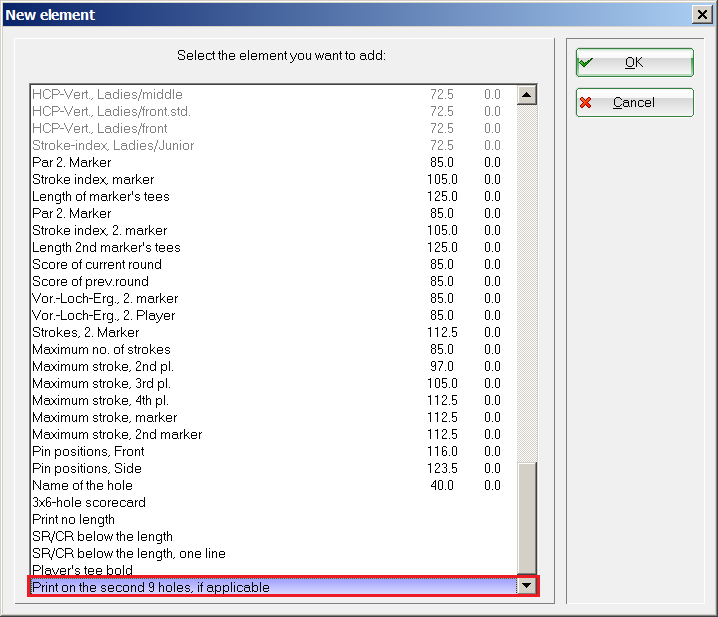
If a 9-hole tournament is played on the holes 10-18 and printed on a pre-printed scorecard (from the print shop), you can print the results for the holes 10-18 by activating the following field in your scorecard layout:
In order to make the correct settings to the field „print for the second 9 holes“, it is also important to set Course data on „the second 9 holes“. Please read Load course data from the intranet for 18 and 9 holes ratings. Here you can find an example for loading course data 10-18, and it also contains a description of the necessary settings.
If you print the scorecards on white paper using PC CADDIE, it is also important that you have the Hole name translation in the course data. Read Load course data from the intranet for 18 and 9 holes ratings. Here you can see how the hole name translation is made.
Scorecard with marked tee-off (Shotgun start)
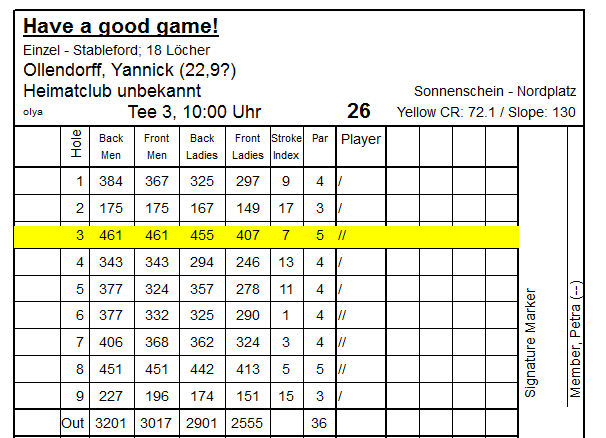
Each tournament start/tee, which differs from tee 1, can be highlighted in the scorecard. The effect: the hole at which it starts is known at the end of the game, and the results are entered accordingly. The marking also works for existing pre-printed club scorecards, since the hole handicaps are entered as usual in the regular order (1 - 18).
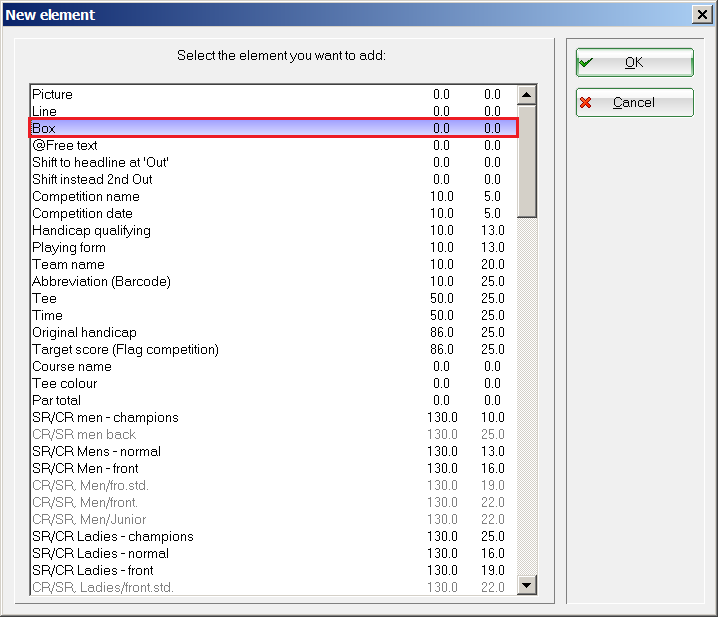
You activate this marker by selecting a colored box in the scorecard layout and placing it on the tee. Select the item „Box“ and make sure that this is UP in the list of the elements used. The command „must“ precede the print commands, which has as result, for example, that the „strokes“ are printed on the „box“. (The elements are applied in the order of their entry):
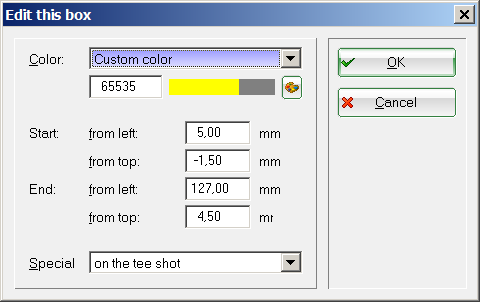
Position the colored box:
- Select color: We recommend suing a highly visible color for testing, which you can later change.
- Use distances similar with the ones from our example, which will color the entire line. These measures can vary, of course, depending on the scorecard layout.
- Select „on the tee shot“.
For testing, look for a tournament with shotgun start, and select a player starting, from example, from tee 3. Maybe you have to move the box after the first print a few millimeters to the left, right, up or down. Just try and test until you are happy with the print-out. If this has been successful, the marking will fit perfectly for all other teas and tournament players!
You can see the result in the next image: the scorecard with the marked start of the shotgun start:
PS: The color appears as a shading (gray) on black and white printers. Choose a bright color to keep the black font readable.
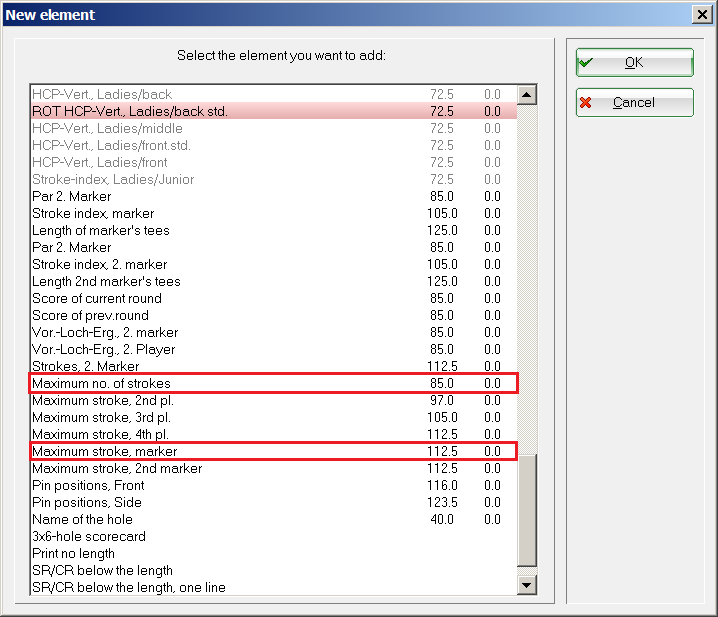
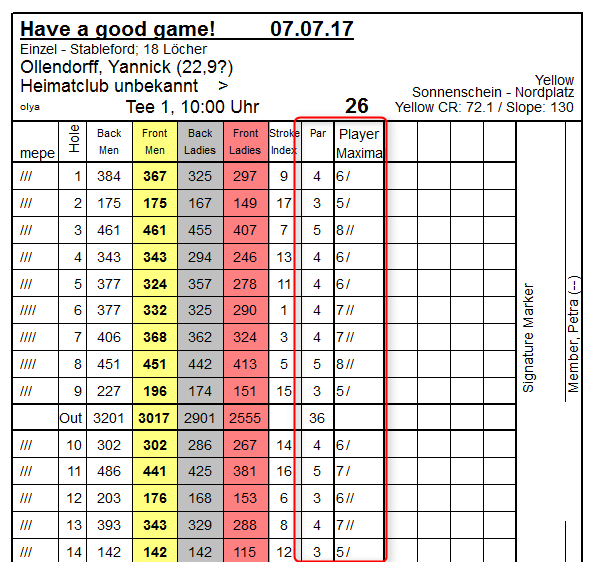
Print the maximum number of hits (handicap)
There is also the possibility to print the maximum number of strikes per hole for which a player would still receive a stableford point. This is certainly a good help especially for players with high handicaps. In addition, this setting promotes the flow of the game.
To do this, select the appropriate scorecard elements and place the position next to the handicap dashes. The maximum number of hits per hole is determined from the par of the hole and the handicap:
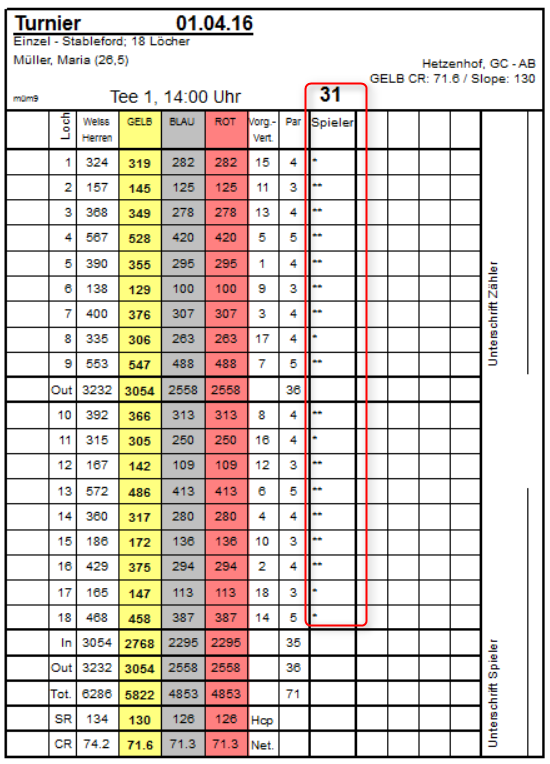
Handicap asterisks instead of handicap dashes
You can print asterisks instead of dashes using a special setting. Please contact the support@pccaddie.com
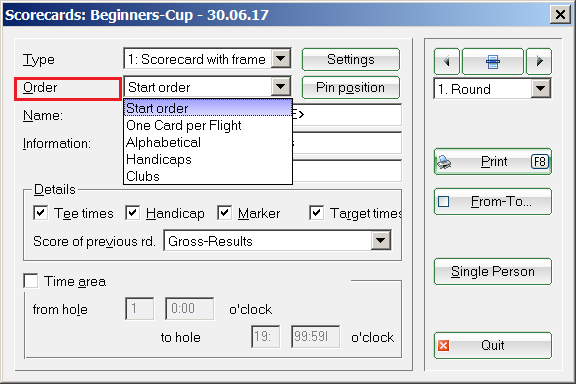
Order
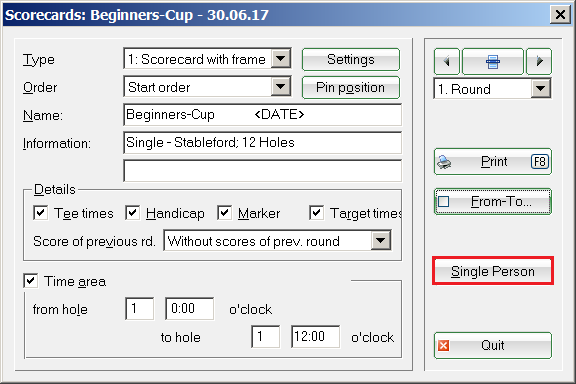
The field Order offers you the following options:
- Start order
- One card per flight
- Alphabetical
- Handicaps
- Clubs
Particularly important is „One card per flight“. This option should be used to print only one card for each team at a Pro/Am tournament. This is automatically the case with four- or scramble-tournaments, as there are team handicaps in these tournament forms.
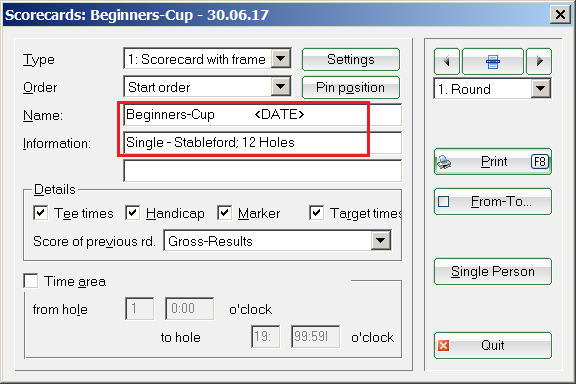
Name and Information
Check the tournament name and the additional tournament information. If necessary, PC CADDIE shortens the tournament name, so you should check whether the abbreviation makes sense. The second information line allows you to specify additional free text. Set the position for printing this information using the element „Additional info 2“ under Settings.

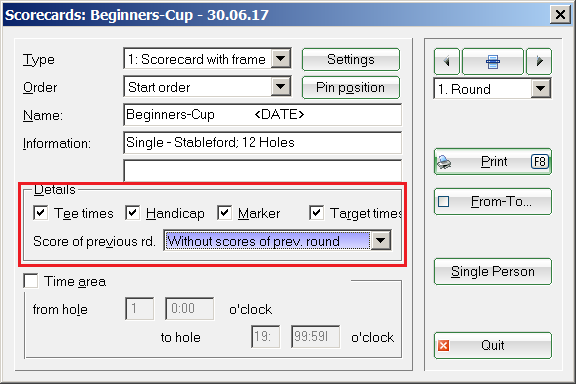
Details
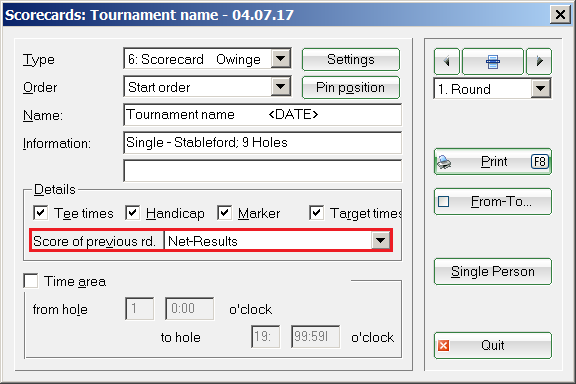
Mark here which additional information is to be printed on the card. If, for example, the Score of previous round is to be printed on the scorecard for the second round in the case of multi-round tournament, choose between gross and net results.
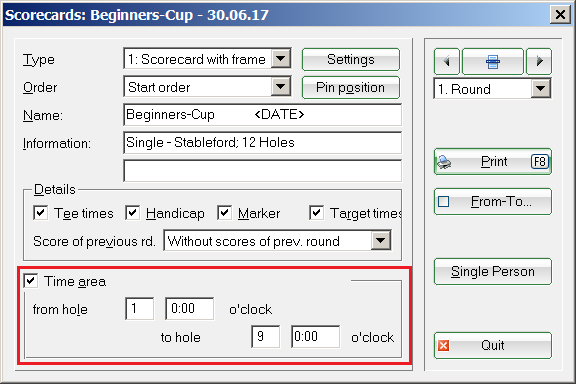
Time area
You can select the time range for which the scorecards should be printed if you want to print only a part of the start list, after activating the Time area .
Start/test the printout
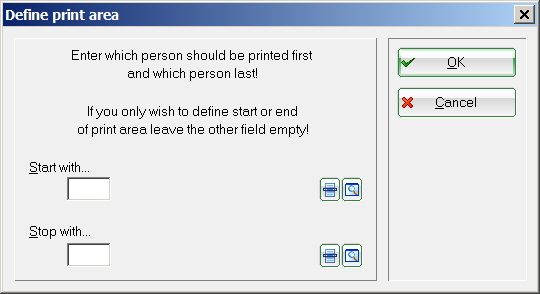
The printout is usually started with Print (F8). All scorecards are then printed one after the other. Use the button From-To… if the printing is interrupted and you want to resume from a certain player:
Here you can specify from which player you want to restart the printout. If necessary, you can also specify where to stop.
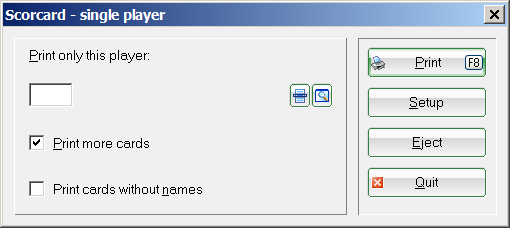
If you want to reprint individual scorecards, or just test the printout, use the Single Person button:
Specify the player whose scorecard you want to print. In the case of a four-ball game, the card is of course printed with the partner.
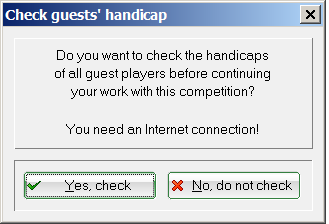
Intranet check of guests before printing
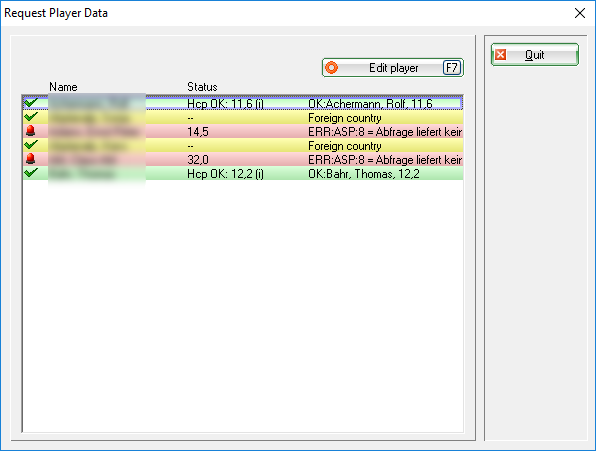
When you start the scorecard printing for the first time in a tournament, you are prompted to synchronize the guests' HCPs with the intranet. In the normal case, select „Yes, check“
The result is as follows:
- The line is marked YELLOW if the handicap has changed, and is marked GREEN if the handicap was already OK before the intranet check.
- The line is WHITE and specifies „foreigner“ if the golfer is not associated with a club.
- RED with the text WRONG ANSWER means that the player with the specified club was not found in the intranet.
Message for new course data
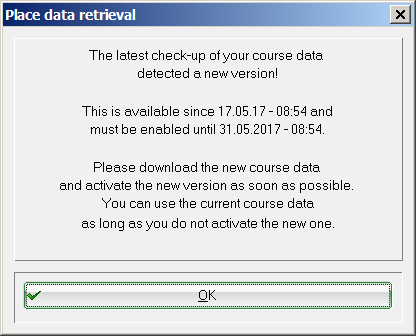
If the association has provided a new rating for your location data, you will receive the following message when printing the scorecards:
You can still print scorecards and conclude tournaments with your old data until the deadline mentioned in the message (14 days)!
You should Download the new course data before the deadline! You will be able to print scorecards and conclude tournaments only with the new data after downloading it.
Label for a flag competition
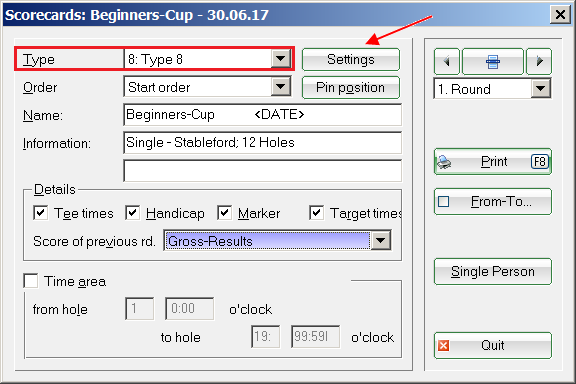
First, select the tournament. Then click on Print/Scorecards and select a „blank“ format, for example, TYPE 8 (the continuous labels and the laser labels offer less options), and click on Settings:
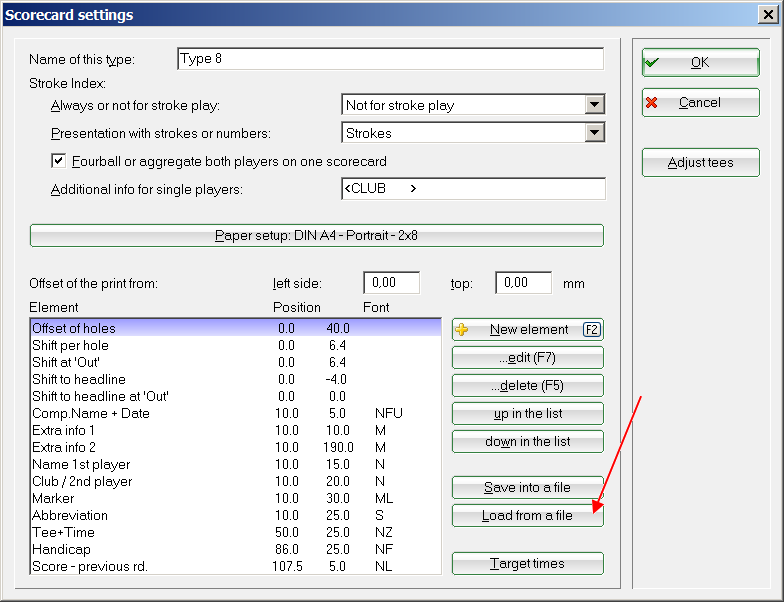
Choose Load from a file
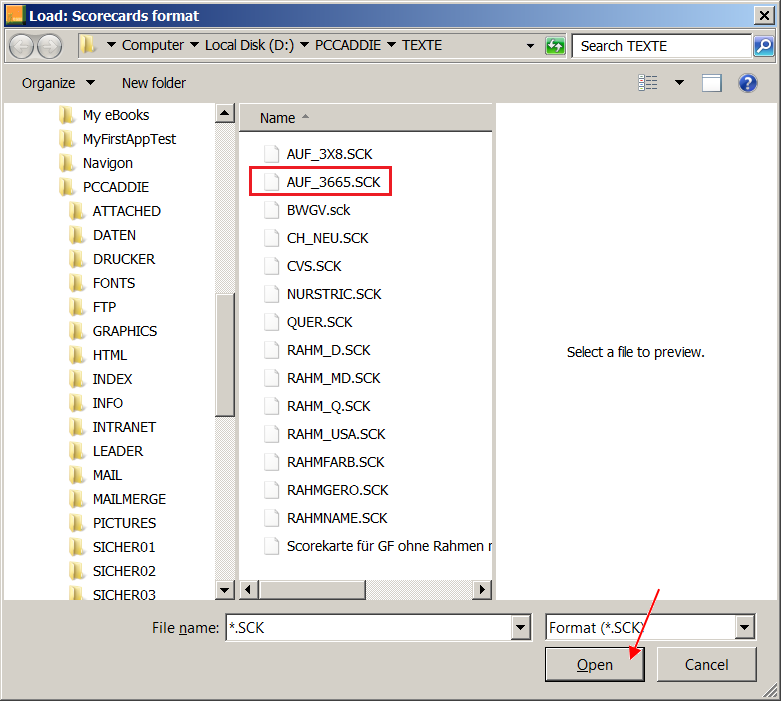
This opens the PC CADDIE main folder TEXTE, where you can select label format 3665 (which would be the right choice for 2 labels next to each other) and confirm with Open.
As you can see, you can also opt for the file AUF3x8, which would be the option for 3 labels next to each other and 8 labels on a Din A4 sheet, if you prefer a smaller format.
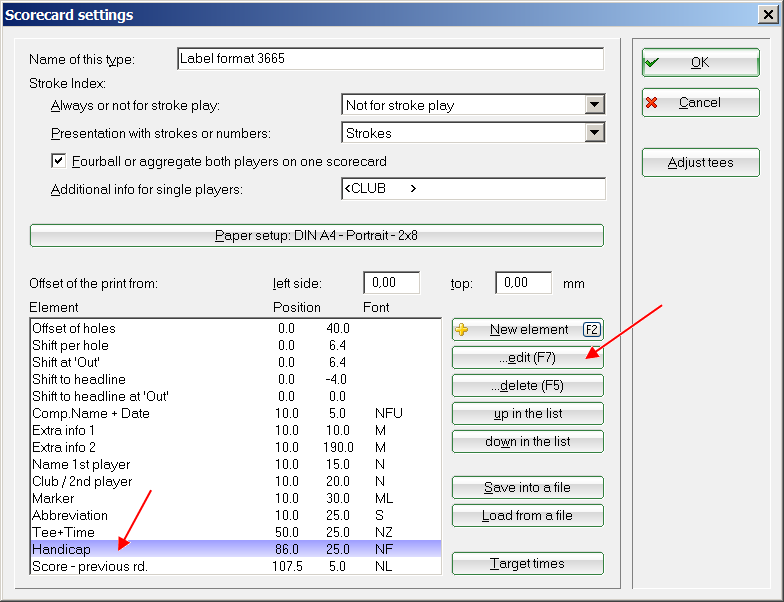
If you now just replace the printing of the handicap with the targeted score, you're done. Select „Handicap“ and click on …edit (F7).

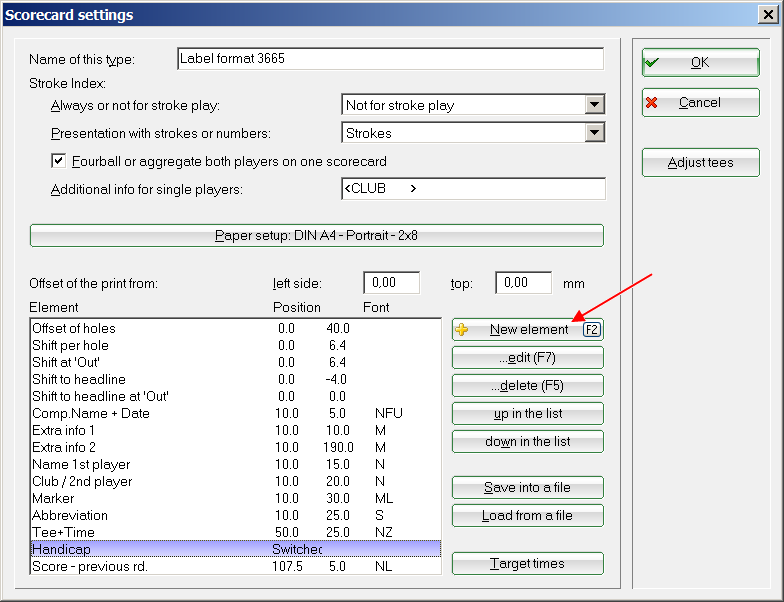
Click on the New Element (F2) button.
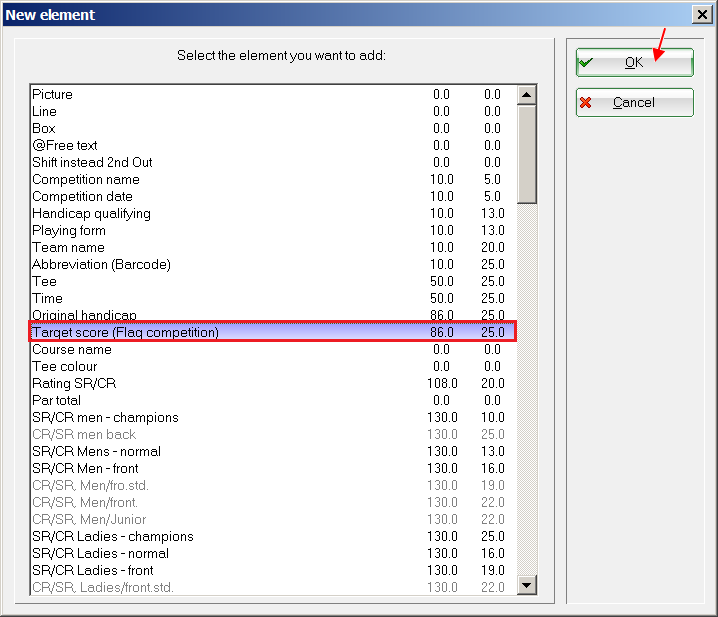
Select the „Target score“ and confirm with OK.
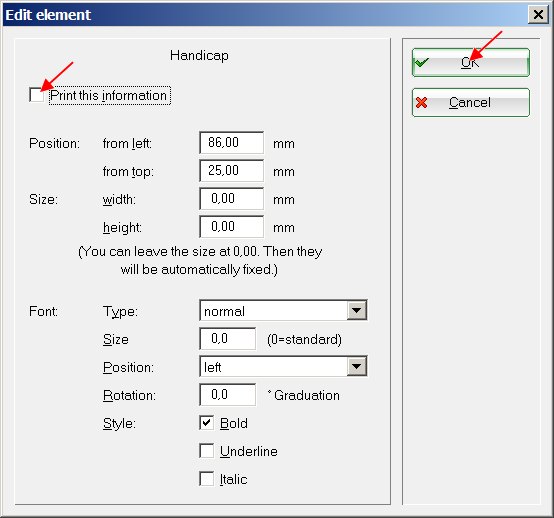
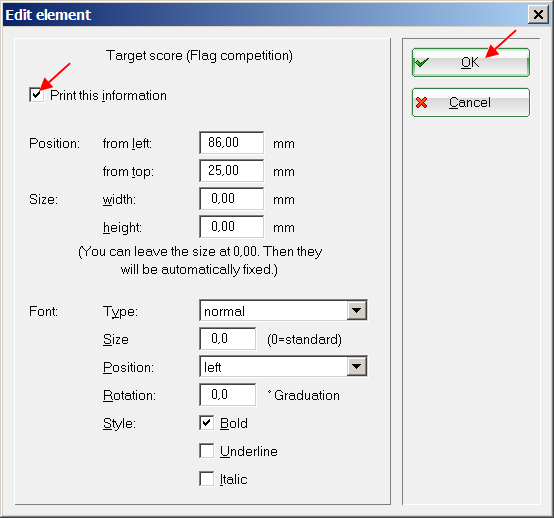
Check the recorded settings, which you have previously noted for „Handicap“. If necessary, they must be corrected. Check the box „Print this information“ and confirm with OK.
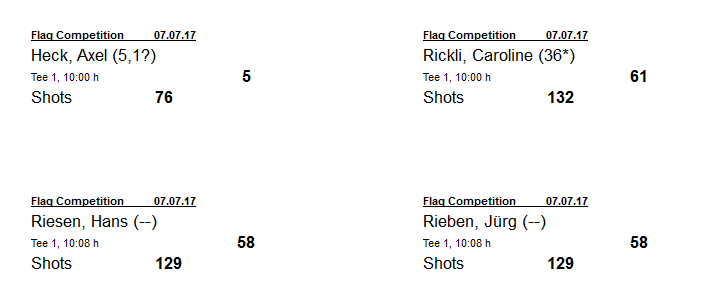
Confirm once more with OK and print the „Scorecards“ as usually; based on your settings, the printout will not be the usual scorecards, but labels. Please see the example. (If you read a bit further you will find out how to change the size of the labels).
You can set the size of the labels using the „Paper setup“:
Pay particular attention to the settings in the lower section of the window. You can adjust how many labels are placed next to each other and above each other on the sheet, and the printout distance to the right and from the top of the paper, in order to adjust the positions.
More scorecards layouts
Create scorecards copy for modification
If you want to make changes to your scorecard, you can first create a copy of and make your changes here. This still gives you the option to access the original scorecard layout, if necessary. For creating a copy you have to first save the currently used scorecard layout. It works like this:
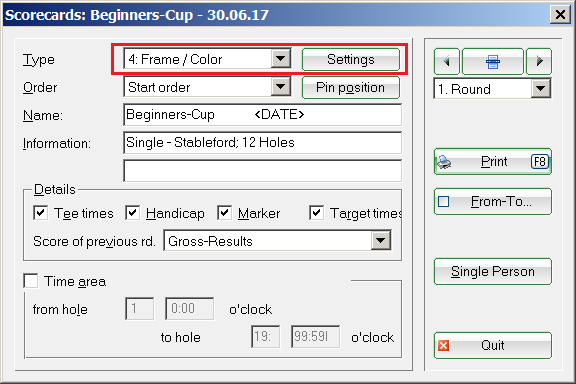
Select your scoreboard type - „4“, in this example - and click on „Settings“
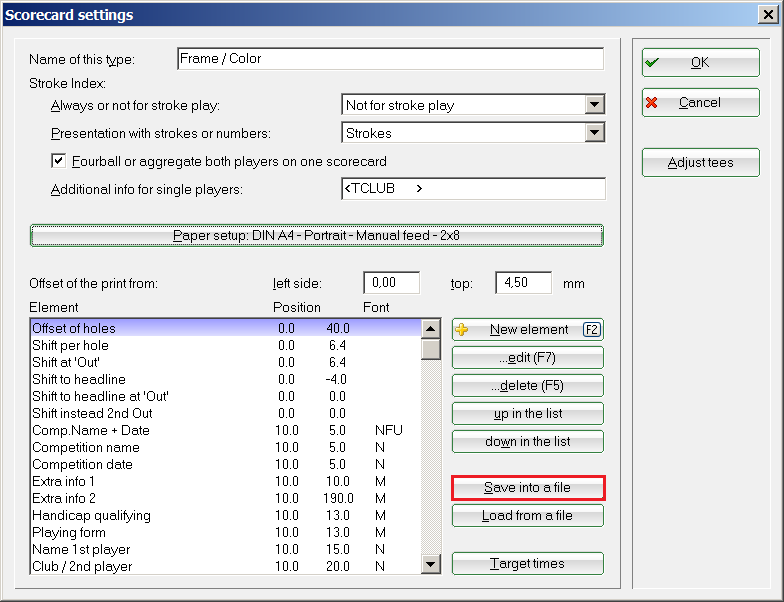
Select „Save into a file“
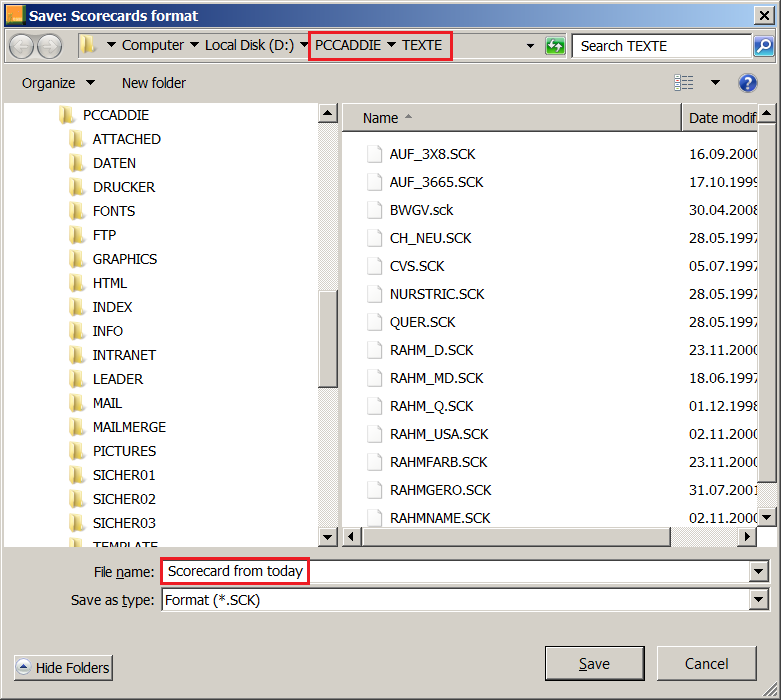
The scorecards' settings are usually saved in the PC CADDIE file TEXTE. This is the suggested path is no other p[ath was previously specified. Give the scorecard a name that you can use to identify it, and then click Save.
You will be automatically prompted to the scorecard you saved, and you should leave this window with OK, so that you can return to the following window:
Now select a scorecard type you are not currently using, Type 9 in this example.
Here you can also have „Landscape“, for example, if you are sure that the Landscape scorecard will not be used for printing the cards. Once you are sure you've set a type that you don't use, click Settings again.
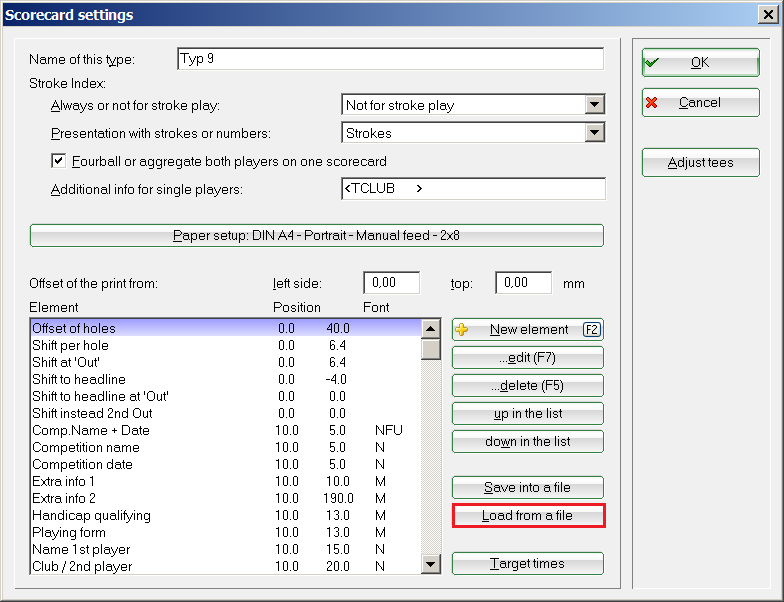
Click Load from a file. This opens the TEXTE file, where you can select the format you previously saved.
Click Open and you can now configure the copy of your scorecard - „Type 9“ in this example.
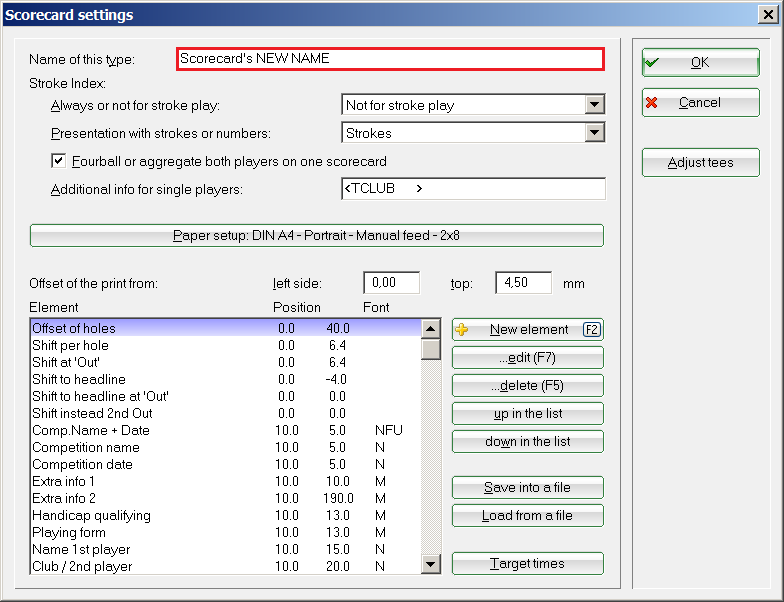
Use a new name for the COPY of your scorecard!
The layout is available under Type 9 with the new name as soon as you click OK. Now you can make your desired changes without affecting the original.
Print the score from previous round
You can use the functionality of printing the „Score from previous round“ also for intermediate results in Eclectic tournaments.

There are 2 ways to set up the tournaments:
- Multi-Eclectic over several single tournaments (recommended if the rounds are spread over the year).
It is important that you select all tournaments, even those which are to be played in the future.
More information here: Create and print annual Eclectic.
- Multiple rounds tournament Eclectic by holes (recommended for daily rounds with dates close to each other).

Now we will explain how you can independently add the printing of previous round results on your scorecard.
It is recommended to test the printout on a copy of the scorecrd.
Here you can find more information about how to create a copy:
Create a copy of a scorecard.
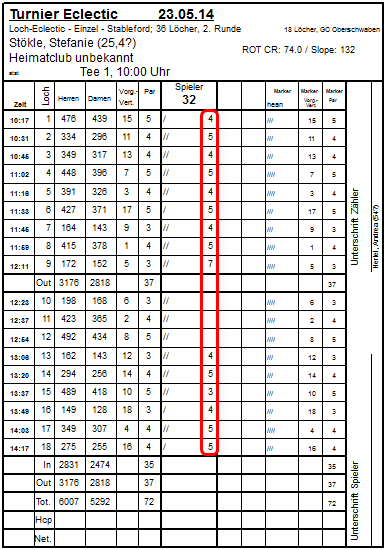
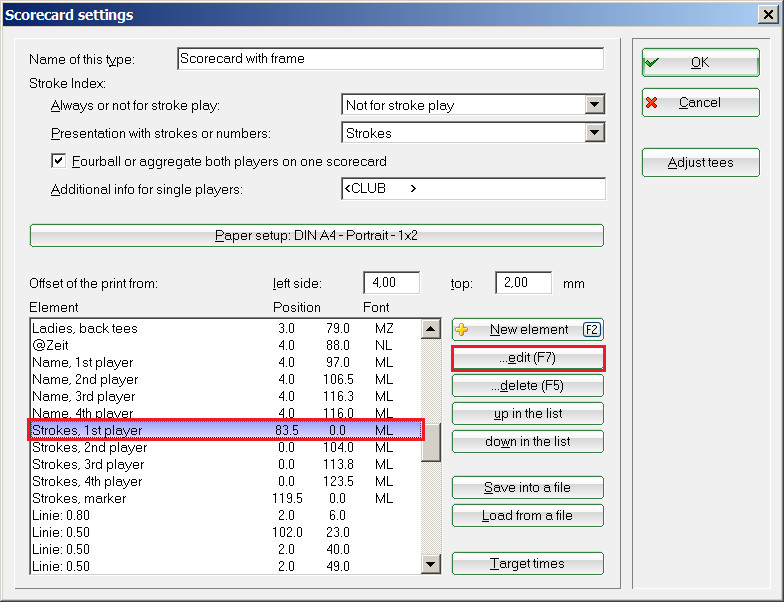
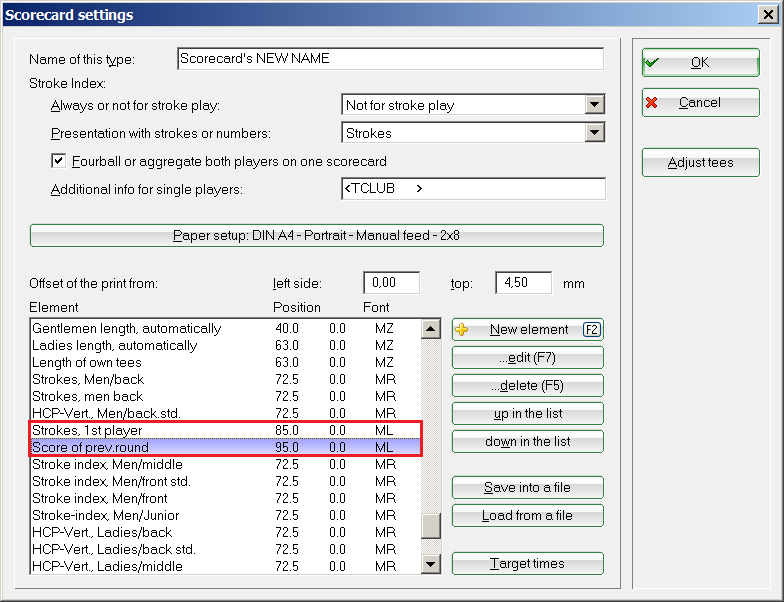
After doing this, decide where you want to position the hole-based previous round results. One possibility is to print them on the right of the handicap strokes. Look at the positions for the Strokes, 1st Player in order to adjust the position. Mark the command as in the following screenshot and click on the ..edit (F7) on the right side of the window.
Write down all the settings for „Strokes, 1st Player“. For the setting of the preliminary round scores, which in our example are to be printed to the right of the strokes, we only added the corresponding millimeters for „Position from left“.
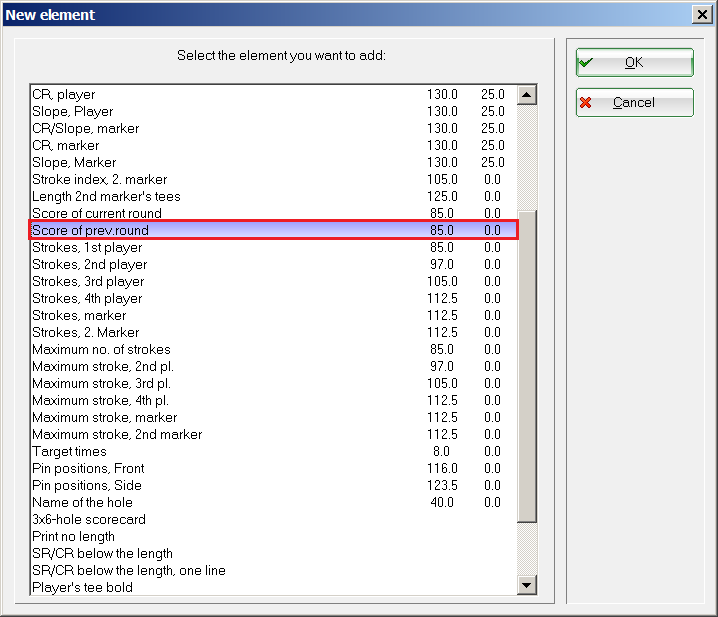
Everything recorded? Then go back to this window and right click on New Element.
Scroll down until you find Score of prev. round.
Select it and confirm with OK.
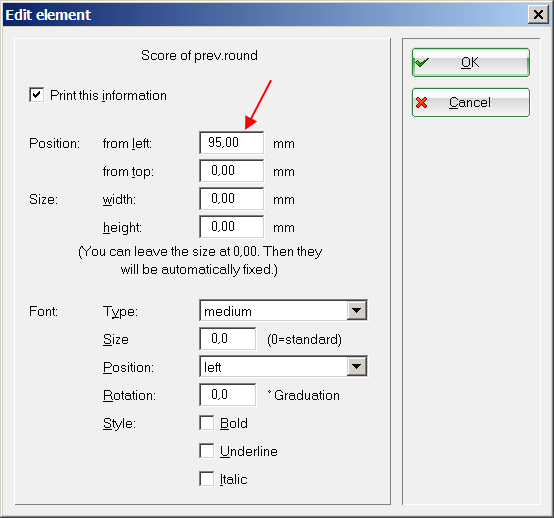
You can then enter the position for the command. Compare the settings with your previously recorded settings and change as required. Pay attention to „Position from left“.
After doing all this you will see that the command is now available for your scorecard. Confirm with OK and test the score card for the 2nd round in a suitable tournament (of course, the player should already have a result in the first round).
Before printing, you can still set whether you want to print the gross or net results.

The command to use is: Score of prev. round, Marker and you can find it in the same way under „New Element“. You can position it, for example, near the Strokes, Marker. Good luck!
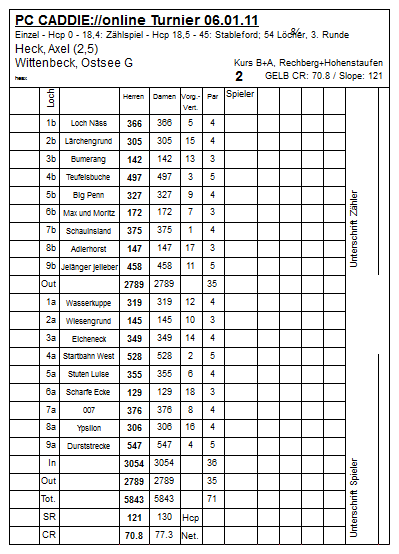
Example scorecard with holes' names
Load course data from the intranet explains how to enter the holes' names.
Customized scorecards templates
PC CADDIE will be happy to provide you with a customized template. Please feel free to contact [[support@pccaddie.com] about the current prices and offers for the creation of templates.
Sample scorecard with filled calculations
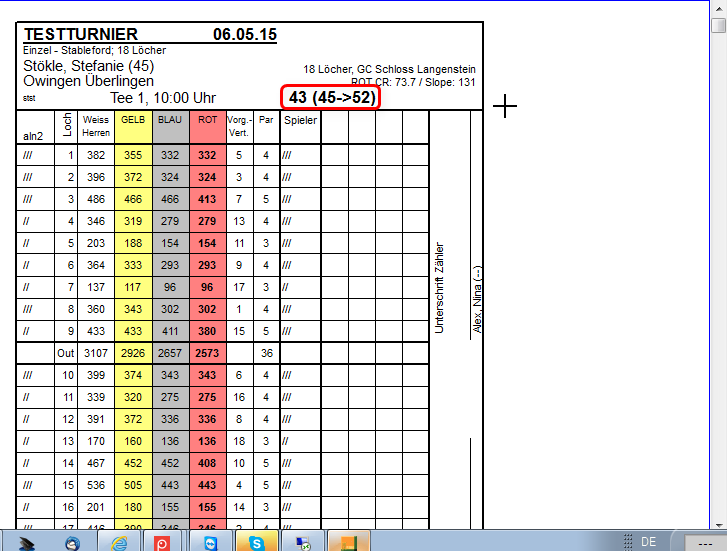
If you entered in the tournament mask 36 when calculating, the scorecard for a player with higher handicap looks as follows::
- 43 is the handicap set for the calculation 36,
- the master handicap 45 with the game handicap 52 is in parentheses,be 52,
- the handicap strokes are printed completely with 52 on the scorecard.
- This is absolutely important, as the tournament could be handicap effective and the player must be reckoned with the original handicap 45 when calculating the results.
- Only on the result list is the player's net placed with the calculation 36 and game handicap 43, thus falling further backwards in the results list.
