Inhaltsverzeichnis
Create a debiting-file
For direct debits (SEPA-Basic Direct-Debit) and transfers / credits (SEPA-Credit-Transfer).
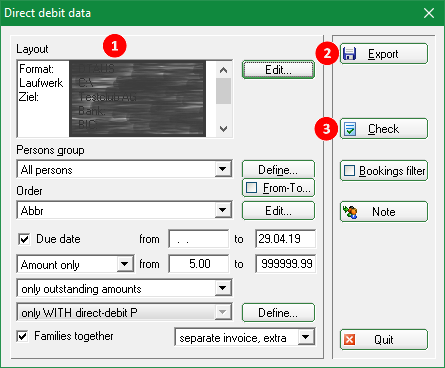
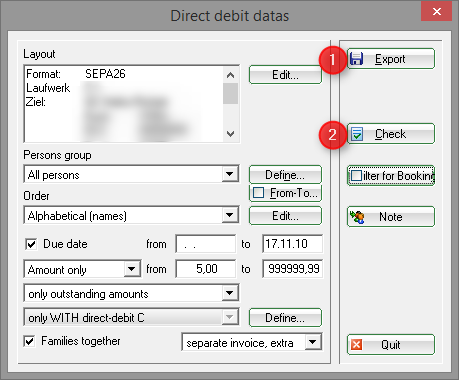
Find the window Direct debit data under Accounts/Payment-Interface:
The procedure should be as follows::
- Check the settings
- Export and print the dispatch note
- Print checklist
Settings - debiting-file
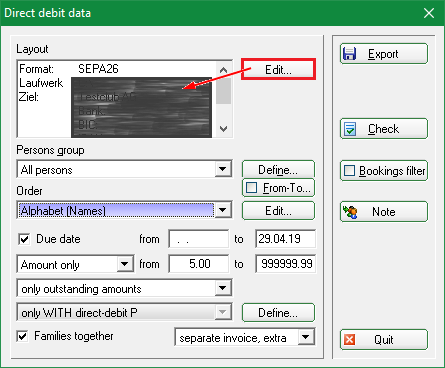
Click on Edit.
The following window opens:

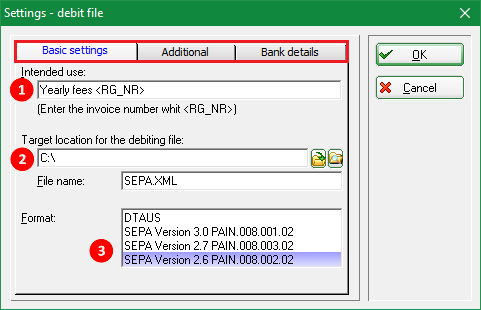
- The Purpose is visible on the customers' account statement.
- The File save path may be a storage medium (for example, an USB stick), but it can also be a folder on your computer. This is where the „SEPA.XML“ file is generated (optionally also „DTAUS“ until 01.31.2014), that you can either forward to the bank or read directly into your online banking program.
- There are multiple SEPA Formats to choose from, including the well-known DTAUS format. If your bank does not yet support SEPA 2.7 with PAIN.008.003.02 XML file you can also use the older SEPA 2.6 with PAIN.008.002.02. You can also choose the DTAUS format during the transitional period.
Continue with the „Amendments“ tab:
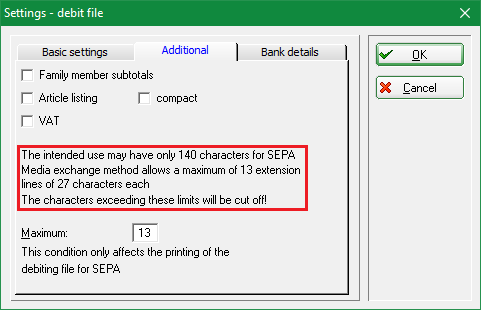
- You can check the Amendments that suit your needs. Checking the „Family members subtotals“ means, for example, that the account statement of a customer also includes how much will be charged for partners or children.
- Note the text in the highlighted field!!
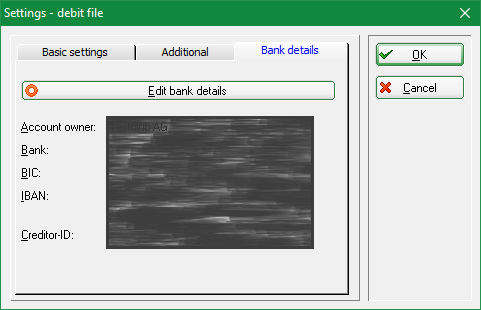
Continue with the „Bank details“ tab:
You can edit the details of the account under Edit bank accounts.
Confirm with OK. You will return to the initial window where you can make the basic settings.
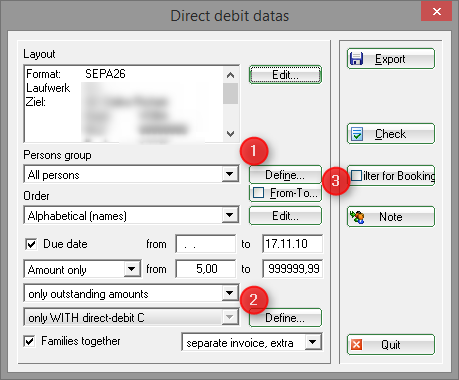
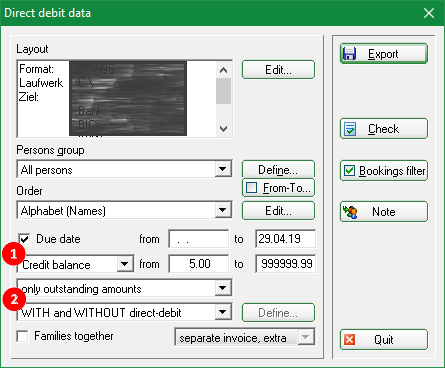
Make the general settings under (1).

(2) is also important; here you should pay attention to the Merge families.

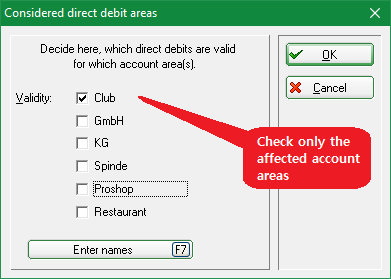
The area set here automatically determines the correct automatic selection for the invoice printing (must be specified in the invoice layout), if the comments are printed on the invoice and if the invoice is to be withdrawn or remitted.

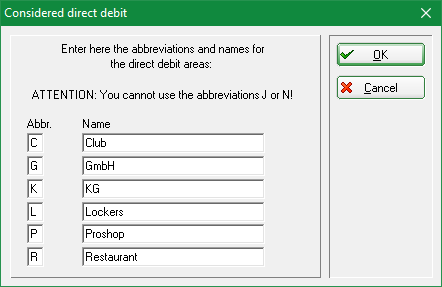
These settings can be found under: Define direct debit
Filter for bookings
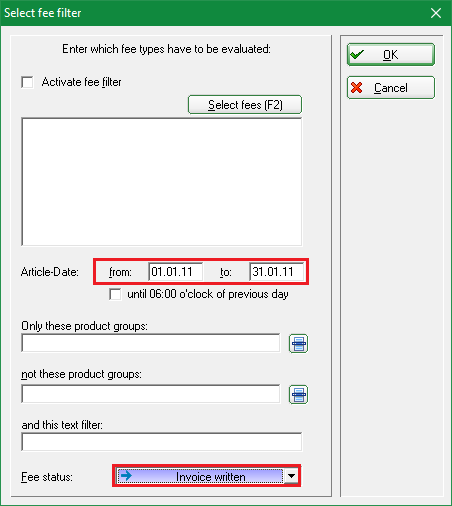
You can set a Filter for bookings (3) for the collections. This is particularly useful and important for your monthly collections. For example, if you create an invoice in January for all the articles of the month for the whole year, it is important that you set the due date for specific articles using the filter. Here you can also specify that only the invoiced items are to be considered. This is important if you have also made payments within the respective period (so these are not deducted).
However, the use of the booking filter always leads to many questions, especially if the accounts are maintained quite differently. It is easier if you create your invoices every month, then the balances will be exactly the same as the total debited.

Create the debiting file
General

You will now see a floppy symbol in the account of the concerned persons. You can repeat the process as often as necessary in case of errors.

Start export - SEPA 3.0
New rules for SEPA-File (Version 3.0) since 2017:
Important new features for SEPA 3.0:
- Deadline generally only 1 day in the whole SEPA area. Euro-Express direct debits (COR1) are therefore eliminated.
- The difference between first (FRST) and repeated (RCUR) entry is eliminated.
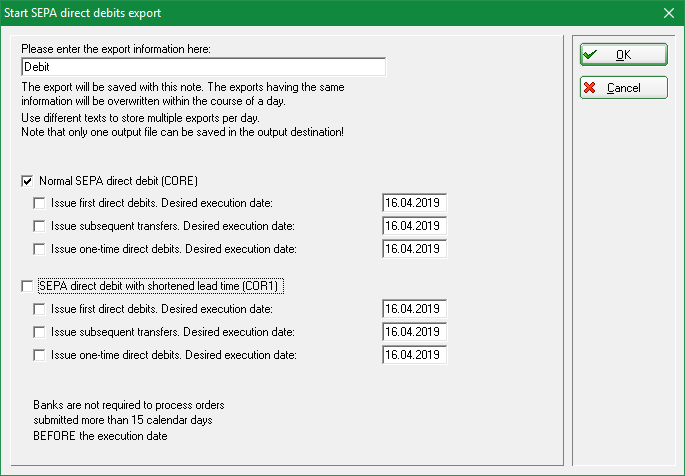
The followingwindow opens as soon as you click on Export.
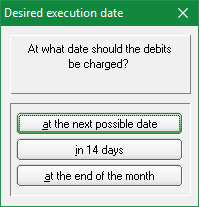
Sobald Sie auf Ausgeben klicken, öffnet sich folgendes Fenster. Select the desired date; this can also be adjusted again in the next view.
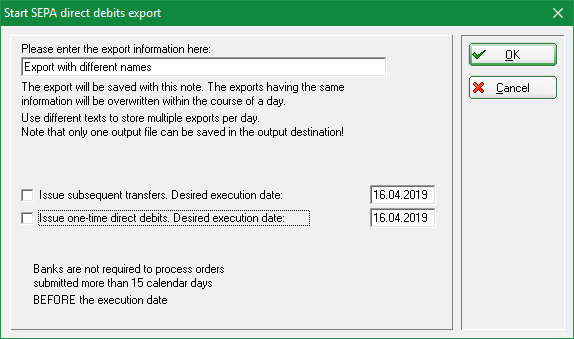
Please note that you have to specify the name of the file separately, if you want to send different files to the bank on the same day. This is important so that the SEPA files are also available for the debiting of direct debits. No separate name is required if you have a single SEPA file per day .
The date is stored in the file and then can also be used for resetting the direct debit (more on that later). Decide whether you want to circulate the initial and the subsequent direct debits separately, and place the check-mark accordingly. Follow-up direct debits are all direct debits that repeat themselves (direct debit authorizations). One-time debits would be, for example, one-time registration for competitions.
The difference between first and subsequent direct debits does not apply to SEPA Version 3.0!
If a bank still has problems with the SEPA version 3.0, you can steel use the version 2.7 (see export instructions up to 2017).
With SEPA 3.0, PC CADDIE complements the file name only with the following identifiers as an indication of the type of orders it contains:
| -RCUR | Only subsequent debits |
|---|---|
| -CRED | Credits |
Start export - SEPA 2.7
2017: For the time being this version will be processed by the banks (otherwise please load the PC CADDIE update):
As soon as you click on Export and check Core or COR1, you will be asked to input the date for the direct debit. The date is stored in the file and then can also be used for resetting the direct debit (more on that later). Decide whether you want to circulate the initial and the subsequent direct debits separately, and place the check-mark accordingly.
PC CADDIE automatically detects whether it is an initial or subsequent direct debit (based on whether the „last use“ in the SEPA Details of the person is empty or not).
Both initial or subsequent direct debit may appear in a SEPA file; this is ensured by the SEPA standard.
In case there are problems with a bank you can leave the due date for one of the two types empty; PC CADDIE will then create a file with only the other kind of direct debits. Afterwards you can create another file, this time leaving the other date field blank. Then you have two files, each with only initial or only subsequent debits (for example, SEPA-FRST.XML and SEPA-RCUR.XML).
PCC complements the file name with one of the following identifiers, as an indication of the type of contracts included:
| -CORR | Initial and subsequent debits (possibly mixed) |
|---|---|
| -FRST | Only initial debits |
| -RCUR | Only subsequent debits |
| -COR1 | COR1-debits (possibly mixed initial and subsequent COR1-debits) |
| -F1 | COR1-only initial debits |
| -R1 | COR1-only subsequent debits |
| -CRED | Credits |
Credits
HINT: Credits/transfers can also be created (SEPA-Credit Transfer).

- Choose Credit balance to generate the credits.
- Select „WITH and WITHOUT direct debit“, so that the persons without a direct debit mandate can also receive credit; for this purpose, their bank data must also be stored.

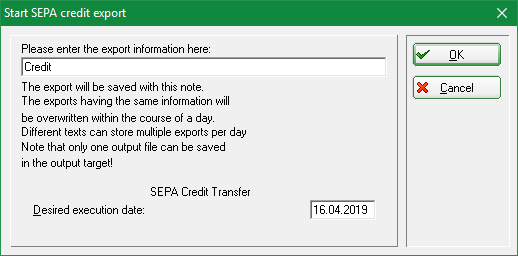
The other settings are made as for the debit generation. In addition, you have the possibility of using the Reset debits function.
- Keine Schlagworte vergeben

